What Actually Happens During a Sealcoating Appointment
Introduction:
The asphalt sealcoating process typically takes one to two days from start to finish: crews clean the surface, repair cracks, apply one or two coats of sealer, and then keep traffic off the pavement for 24 to 48 hours while it cures. If you've been putting off scheduling because you're not sure what the visit involves, how long you'll be without your driveway or lot, or whether the crew will actually prep the surface properly, you're in good company. Many property owners hesitate simply because the process feels like a black box, and that uncertainty makes it hard to tell a quality contractor from a corner-cutter. This guide walks you through exactly what happens, step by step, so you know what to expect and what to ask for.
The Problem: Not Knowing What You're Paying For
Sealcoating looks simple from the outside. A crew shows up, a black liquid goes down, and the pavement looks brand new. But the difference between a coating that lasts three years and one that peels in three months comes down to steps you may never see.
Here are the concerns property owners commonly share:
Uncertainty about how long the driveway or parking lot will be unusable
Worry that the crew will skip cleaning or crack repair to save time
Confusion about why quotes from different contractors vary so much
Fear of sealer tracking into the house or onto floors and carpets
Not knowing how to prepare, or whether they need to be home
Doubt about whether sealcoating is even needed yet
When you don't know what a proper job looks like, it's difficult to judge an estimate or hold a contractor accountable. That's why understanding the appointment from start to finish is one of the most valuable things you can do before you book.
Before the Appointment: Inspection and Planning
A good sealcoating job actually begins before the crew arrives with equipment. A reputable contractor will inspect the surface, measure the total square footage, and note the condition of the asphalt. They're looking for cracks, potholes, oil stains, drainage problems, and areas of heavy wear.
This visit is also when you should confirm the weather plan. Sealer needs dry pavement, temperatures above roughly 50°F, and no rain in the forecast for at least 24 hours. Contractors who are upfront about rescheduling for bad weather are far more trustworthy than those who insist on working regardless of conditions.
You'll also receive instructions on how to prepare. Typically that means:
Moving vehicles, trash bins, and outdoor items off the pavement
Turning off automatic sprinklers for at least a day before and after
Planning where you'll park during the curing period
Keeping pets and children away from the work area
The Solution: The Asphalt Sealcoating Process, Step by Step
Once the day arrives, a professional crew follows a consistent sequence. Skipping any part of it reduces how well the sealer bonds and how long it lasts.
Step | What Happens | Why It Matters |
|---|---|---|
1. Cleaning | Blowers and brooms remove dirt, leaves, and loose debris | Sealer can't bond to a dirty surface |
2. Weed and stain treatment | Vegetation is removed and oil spots are treated with a primer | Oil prevents adhesion and causes peeling |
3. Crack filling | Cracks are cleaned and filled with a flexible rubberized sealant | Keeps water out of the base layer |
4. Masking edges | Curbs, garage doors, and walkways are protected | Creates crisp lines and prevents mess |
5. Mixing the sealer | Sealer is blended with water and, when appropriate, sand or additives | Proper consistency affects coverage and texture |
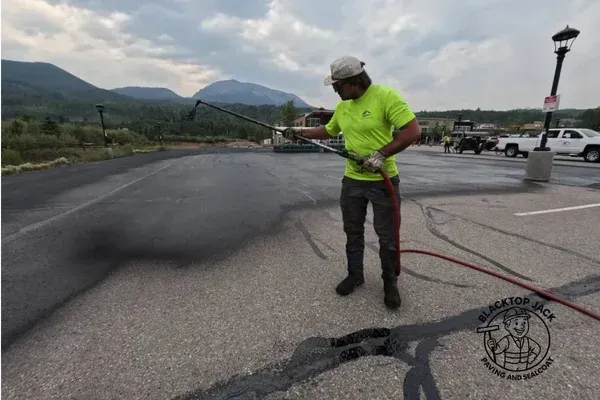
6. Application | Sealer is applied by squeegee, brush, or spray in even coats | Uniform coverage gives consistent protection |
7. Second coat (if needed) | A second thin layer is added after the first dries | Increases durability on worn surfaces |
8. Curing | Area is barricaded while the sealer dries and hardens | Traffic too soon leaves marks and damage |
Step 1 and 2: Cleaning and Prep
Preparation is where the best contractors separate themselves. Sealer is a thin coating, so it only performs as well as the surface underneath. Crews clean thoroughly with power blowers and stiff brooms, and heavier buildup may require pressure washing. Oil and grease stains get a special primer or spot treatment, because sealer applied directly over oil tends to peel away in patches.
Step 3: Crack Filling and Minor Repairs
Cracks are filled before the main coat so water can't work its way into the base. Small potholes and low spots may also be patched at this stage. If the damage goes beyond surface-level wear, a contractor should tell you honestly, because sealcoat can protect asphalt but can't fix a failing base. In those cases, a broader approach to sealcoating and paving may be the smarter investment, and you can learn more about how those services work together in this overview of superior sealcoating and paving.
Step 4 to 7: Mixing and Application
Sealer isn't simply poured from a bucket. It's mixed to the right consistency, and in commercial or high-traffic areas, fine sand may be added for traction and durability. Crews apply it in thin, even coats. Two thin coats generally outperform one thick coat, since thick layers can crack and flake as they dry. Edges and tight spots are usually hand-brushed for a clean finish.
Step 8: Curing and Reopening
After the final coat, the pavement is blocked off so nothing touches it while it cures. Most sealer is dry to the touch in about 4 to 8 hours, but it needs 24 to 48 hours before vehicles can safely drive on it. Cool, humid, or shaded conditions can add time.
How Long Does Each Stage Take?
Timelines vary with the size of the area and the weather, but this gives you a realistic picture:
Project Type | Typical Work Time | Time Until Vehicles Can Return |
|---|---|---|
Standard residential driveway | 2 to 4 hours | 24 to 48 hours |
Long or multi-car driveway | 4 to 6 hours | 24 to 48 hours |
Small commercial lot | 1 day | 24 to 48 hours |
Large commercial lot | 1 to 2 days, often in phases | 24 to 48 hours per section |
Commercial properties often schedule sealcoating in sections or after hours so customers can still access the business.
What You Should Do During and After
Your role is small but important. During the appointment, stay off the surface, keep pets and kids clear, and avoid walking on it even if it looks dry. Sealer can look cured while still soft underneath.
Once the pavement reopens, avoid sharp turns with the steering wheel while the vehicle is stationary for the first couple of weeks, since this can scuff a fresh coating. Keep sprinklers pointed away from the edges, and clean up any spills promptly.
Why Pavement Maintenance Doesn't End After Sealcoating
Sealcoating is only one piece of good pavement maintenance. Think of it as a protective shield that works best when the asphalt beneath it stays sound. Cracks that appear after sealing should be filled promptly, drainage should be kept clear, and the surface should be inspected regularly for wear. Most properties benefit from resealing every two to three years, depending on traffic, sun exposure, and climate.
If you want to go deeper on asphalt performance, material science, and best practices, the Asphalt Institute Bookstore offers technical publications and reference guides used across the industry. Even if you're not a technical reader, it's a useful look at why preventive care consistently costs less than major reconstruction.
Red Flags to Watch For
Knowing what a good appointment looks like also helps you spot a poor one. Be cautious if a contractor:
Skips cleaning or applies sealer over wet, dirty, or oily pavement
Refuses to fill cracks first or dismisses them as unimportant
Applies one very thick coat instead of thin, even layers
Won't reschedule for rain or cold weather
Gives a vague estimate with no details on materials or coverage
Can't explain their curing and barricade process
Frequently Asked Questions
1. What is the asphalt sealcoating process from start to finish?
The asphalt sealcoating process includes cleaning the surface, treating oil stains, filling cracks, masking edges, applying one or two coats of sealer, and allowing 24 to 48 hours of curing before traffic returns.
2. Do I need to be home during the appointment?
Not necessarily, but it's helpful to be available at the start to confirm the work area and at the end for a walkthrough. Make sure vehicles are moved beforehand.
3. How soon can I drive on a freshly sealed driveway?
Most sealer allows foot traffic after 4 to 8 hours and vehicle traffic after 24 to 48 hours. Wait longer if the weather is cool, humid, or shaded.
4. Is sealcoating and paving the same thing?
No. Paving installs or replaces the asphalt surface, while sealcoating is a protective layer applied over existing asphalt. Sealcoating and paving work together as part of a long-term maintenance plan.
5. How often should asphalt be sealcoated?
Most driveways and lots benefit from sealcoating every two to three years. Sealing too often can cause buildup and peeling, while waiting too long allows oxidation and water damage.
6. How does sealcoating support pavement maintenance?
Sealcoating is a cornerstone of pavement maintenance. It blocks water, UV rays, and chemicals, slowing deterioration and helping you avoid expensive repairs or early replacement.
Book Your Sealcoating Appointment With Confidence
Now that you know what a proper sealcoating visit looks like, you can hire with confidence. Blacktopjack.com follows every step of the process, from careful cleaning and crack repair to even, professional application, so your pavement is protected and looks great for years. Whether you need help with a single driveway, a commercial lot, or a full pavement maintenance plan, our team gives you clear communication and honest recommendations. Contact us today for a free estimate and schedule your appointment before the next good weather window passes.
The Takeaway
A great sealcoating job is defined by preparation, not just the black finish you see at the end. Cleaning, oil treatment, crack filling, thin even coats, and proper curing time are what make the asphalt sealcoating process effective. Know what to expect, prepare your property, ask contractors how they handle each step, and follow up with routine pavement maintenance. Do that, and your driveway or parking lot will stay protected, attractive, and cost-effective for years to come.