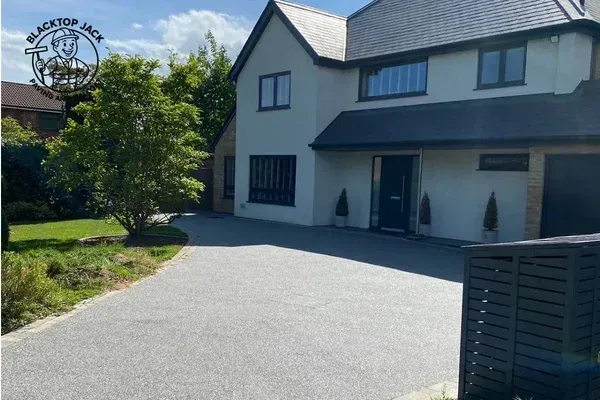
Asphalt driveway installation near me
New Driveway Installation: What Actually Happens Behind the Scenes
Most homeowners get three or four quotes before installing a new driveway, yet almost none of them actually understand what separates a $6,000 job from a $12,000 one for what looks like the same size driveway and that knowledge gap is exactly what makes it so easy to either overpay or unknowingly hire someone cutting corners, both of which turn into pavement maintenance headaches down the road.
If you're getting ready to replace or install a driveway, you've probably already noticed how differently every contractor talks about the process. Some walk you through timelines and materials in detail. Others hand you a one-line quote and expect you to just trust the number. It's genuinely hard to know what a fair price looks like, or what's actually supposed to happen once a crew shows up, when nobody's explained the process in plain terms.
This is one of the most common frustrations we hear from homeowners: not confusion about whether they need a new driveway, but confusion about what they're actually paying for once they say yes. A driveway installation isn't just "pour asphalt, wait, done." There's a sequence of steps that determines whether your driveway lasts 20 years or starts failing within five, and most of that sequence happens before a single drop of asphalt is ever poured.
Let's pull back the curtain on what actually happens during a professional installation, step by step, so you know exactly what you're paying for and what to expect from start to finish.
Why Understanding the Process Actually Matters
It might seem like overkill to understand every stage of installation if you're not the one doing the work. But here's the practical reason it matters: contractors who skip steps almost always skip the ones that aren't visible in the finished product. A rushed base preparation looks identical to a properly compacted one the day the job finishes. The difference only shows up a year or two later, when one driveway is already cracking and the other isn't.
Knowing the process gives you the ability to ask the right questions, spot corner-cutting before you sign a contract, and understand exactly why one quote is significantly cheaper than another. It's also the foundation for understanding your driveway's long-term driveway maintenance needs, since how it was installed directly affects how it should be cared for afterward.
Stage One: Site Assessment and Planning
Before any physical work begins, a proper installation starts with an assessment of your property. This includes evaluating the existing surface (if there is one), checking the natural slope and drainage patterns, and identifying any obstacles like tree roots, utility lines, or drainage pipes that need to be worked around.
This stage also determines the specifications for your project: how thick the asphalt layer needs to be based on expected traffic (a driveway for two sedans needs less thickness than one that regularly sees a work truck or RV), what the base material requirements are, and how the grading needs to be adjusted to ensure proper water runoff.
This is also typically when you'll get your itemized quote, and it's worth paying attention to how detailed it is. A vague, one-line estimate often means these planning considerations weren't actually factored in.
Stage Two: Excavation and Removal
If there's an existing driveway, it needs to be removed, along with enough of the underlying soil to make room for a properly built base layer. This isn't just about clearing the old surface it's about getting down to stable, undisturbed ground that can support what's built on top of it.
For new installations without an existing driveway, this stage still involves excavating enough depth for the base and surface layers combined, typically several inches deeper than most homeowners expect. Skipping adequate excavation depth is one of the most common shortcuts that leads to premature failure.
Stage Three: Base Preparation
This is, without question, the most important stage of the entire process, and it's also the stage most likely to get rushed by contractors trying to cut costs or timelines.
A proper base consists of compacted gravel or crushed stone, laid in layers and compacted with heavy equipment between each layer. This base does two critical jobs: it provides a stable foundation that distributes weight evenly, and it allows water to drain properly instead of pooling underneath the asphalt.
Contractors trying to save time will sometimes skip proper compaction between layers, use insufficient base material, or build on top of unstable soil without addressing it first. The finished driveway looks identical either way until the ground beneath the shortcut version starts shifting, usually within the first couple of years.
Stage Four: Grading and Slope
Before asphalt goes down, the base needs to be graded to ensure proper water runoff. A slight, consistent slope directs rainwater away from the driveway surface rather than allowing it to pool. This step is closely related to drainage planning from stage one, and it's another area where rushing or imprecise work creates problems that don't show up until the first heavy rainstorm.
Stage Five: Asphalt Application
This is the stage most people picture when they think about driveway installation, and it typically involves one or two layers of hot-mix asphalt, applied and compacted while still warm.
The binder (base) layer goes down first, providing structural strength. If a second layer is used, a surface (wearing) layer follows, creating the smooth, finished appearance most people expect. Each layer is compacted using rollers while the asphalt is still hot and workable, which is essential for achieving proper density. Asphalt that isn't compacted correctly while warm won't reach the strength it's designed for, even if it looks fine once it cools.
Stage Six: Curing and Initial Care
Freshly installed asphalt needs time to cure and harden fully, even though it may feel solid to the touch within a day. Most professionals recommend avoiding heavy vehicle traffic for the first few days, and full curing can take several weeks to a few months, depending on climate and temperature.
This is also typically when a contractor should walk you through initial driveway maintenance expectations: when to expect your first sealcoat application (usually within 6 to 12 months), how to avoid early damage from sharp turns or heavy point-loads while the asphalt is still settling, and what normal curing looks like versus a sign of a problem.
A Realistic Installation Timeline
Stage | Typical Duration | What's Happening |
|---|---|---|
Site assessment & planning | 1–3 days (may include a return visit) | Evaluating slope, obstacles, and specifications |
Excavation & removal | 1 day (varies by driveway size) | Removing old surface and excavating to proper depth |
Base preparation | 1–2 days | Layering and compacting gravel base |
Grading & slope adjustment | Same day as base prep | Ensuring proper water runoff direction |
Asphalt application | 1 day | Applying and compacting hot-mix asphalt layers |
Initial curing (light use) | 2–3 days | Avoiding heavy vehicle traffic |
Full curing | Several weeks to a few months | Asphalt reaches full hardness and strength |
Weather plays a meaningful role in this timeline, since asphalt installation requires dry conditions and appropriate temperatures. A contractor pushing to install in poor weather conditions to hit a deadline is often prioritizing schedule over quality.
What Actually Drives New Driveway Cost
Understanding what goes into each stage also explains why quotes vary so much between contractors, and why the same size driveway can come with wildly different price tags. Here's a breakdown of the factors that most significantly affect new driveway cost.
Cost Factor | Why It Matters |
|---|---|
Excavation depth and existing surface removal | Deeper excavation and old material disposal add labor and equipment costs |
Base material quality and thickness | A thicker, properly compacted base costs more but dramatically improves longevity |
Asphalt thickness | Thicker asphalt layers cost more upfront but resist cracking and rutting better |
Drainage and grading complexity | Properties with challenging slopes require more grading work |
Driveway size and accessibility | Larger or hard-to-access driveways require more time and equipment maneuvering |
Regional labor and material costs | Prices vary based on local market conditions |
A quote significantly below others in your area is often a signal that one or more of these factors is being minimized, most commonly base thickness or compaction quality, since those are the easiest corners to cut without it being obvious in the finished appearance. This is exactly why new driveway cost comparisons should never be based on the bottom-line number alone.
What to Ask When Searching for a Contractor
If you're comparing options after searching for asphalt driveway installation near me, these questions help you understand whether a contractor is planning to do the job right:
What base thickness and material are you using, and why?
How many passes of compaction happens between base layers?
What's your excavation depth for a driveway like mine?
How do you handle grading to ensure proper drainage?
What's your recommended timeline before I can drive on it, and before full cure?
A contractor who answers these specifically and confidently is showing you they understand the process at the level that actually matters. Vague or dismissive answers are worth treating as a red flag, regardless of how competitive the price looks.
What Happens After Installation
A finished driveway isn't a "set it and forget it" investment. The care it receives in the months and years after installation determines whether it reaches its full expected lifespan or starts showing problems ahead of schedule. This is where understanding proper pavement maintenance becomes just as important as the installation itself scheduling that first sealcoat within the recommended window, watching for early cracks, and keeping up with routine care from day one.
If you want a closer, visual look at exactly what a professional installation looks like in progress, from base preparation through the final compacted surface, our detailed walkthrough on fresh asphalt installation covers the process in more depth, showing what each stage should actually look like when it's done correctly.
Bringing It All Together
A new driveway installation involves far more than what happens on the one day asphalt actually gets poured. The stages that happen before that site assessment, excavation, base preparation, and grading are what actually determine whether your driveway lasts its full expected lifespan or starts failing years ahead of schedule. Understanding this process gives you the ability to evaluate quotes intelligently, ask the right questions, and know what to expect once the work begins.
Clear takeaway: The quality of a new driveway is determined by stages most homeowners never see. Ask about base preparation and compaction before you ask about price, and follow through with consistent pavement maintenance once it's installed to protect that investment for decades.
Ready for a Driveway Installation Done the Right Way?
Blacktop Jack walks every homeowner through the full installation process before work begins, with detailed, itemized estimates that show exactly what you're paying for, from base preparation through final compaction.
Request your free, no-obligation installation quote today and get a clear breakdown of what your driveway actually needs, with zero guesswork and zero shortcuts.